In this post we are going to be setting up SSL in NetScaler using Self Assigned Certificates generated from a Microsoft Certificate Server.
In normal production circumstances you would generally use the Certificate Signing Request (CSR) to generate a domain certificate for signing by a Certificate Authority (CA). However, in some cases you only really need a self-signed cert for your public IP address.
Many people refer to these as being less secure and this is not correct. They give less trust but the security can be even higher than commercial certs since you have full control over the creation process. However, using self-signed certs means finding secure ways to deliver the new root certificate to clients and the private key of the root needs to be secure.
Why is SSL important? It creates an encrypted link between a web server (NetScaler) and a browser. This link ensures that all data passed between the web server and browsers remain private.
**The keys you generate during this process need to be removed from the NetScaler once the setup is complete, this is especially important for setups where the NetScaler is outside the internal network in a DMZ.**
Now lets get to it – Creating the RSA Key
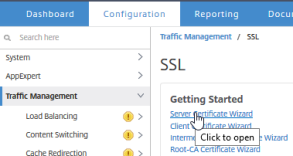
In the NetScaler GUI go to the Configuration tab, in click Traffic Management, and then click SSL. Click Server Certificate Wizard then fill in the field making sure to encrypt the key file with a passphrase.

After you create the RSA key, create the CSR.
Creating the Certificate Signing Request
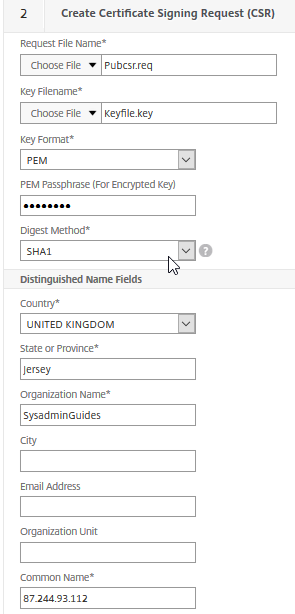
Now in the same window create the CSR
Use the PEM passphrase you used for your RSA key.
Important: The Common Name is going to be your public IP address. This is the IP address users connect to gain access to the NetScaler login page.
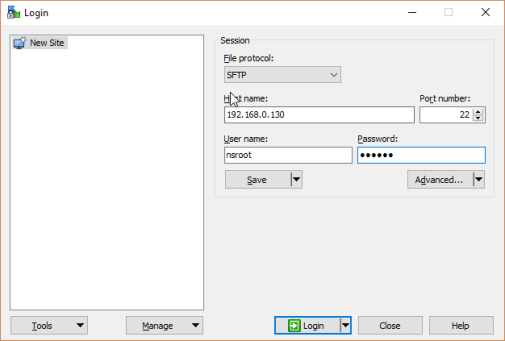
After you complete the CSR, the next step in the SSL Certificate Wizard is to create the certificate. Do not do this. Instead, copy the certificate from the /flash/nsconfig/ssl/ directory on the NetScaler appliance to a Windows computer. You can use the utility WinSCP to transfer the certificate.

After you have saved the CSR to your Windows computer, use the Microsoft Active Directory Certificate Services to Request a certificate.
[Optional – you can use SSL to communicate from NetScaler Gateway to your StoreFront and XenApp/XenDesktop farm.
Additionally You can return to this page to Download the CA Certificate (Base 64). This will be needed later.
Create a certificate by using Microsoft Active Directory Certificate Services
Important: For this part you will need the Certification Authority role installed in your environment. In my case I installed it on my Domain Controller.
Navigate to Microsoft Active Directory Certificate Services. http://<your CA server>/certsrv.
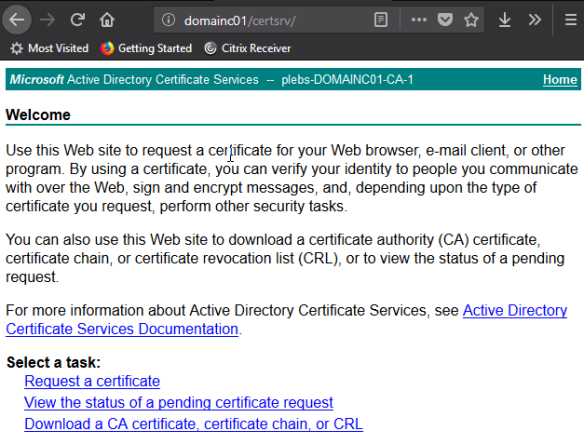
Click Request a certificate then Advanced Certificate request.

Open the CSR saved to your computer using Notepad. Copy and paste the contents into the text box under Saved Request. In Certificate Template, select Web Server and click Submit.

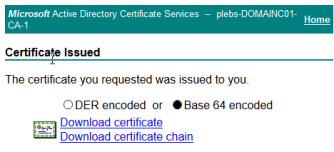
Click the Base 64 encoded radio button then press Download certificate.
Install the Microsoft-generated certificate
Return to the NetScaler SSL Server Certificate Wizard, skip step 3, and go to step 4 to install the certificate. Fill in the fields making sure to upload your saved Microsoft certificate (certnew(2) in my case) on your computer under Certificate File Name and your RSA key you create earlier under the Key File Name.
When the certificate uploads, a prompt appears for the name and password of the Key File that you created earlier. Once everything is filled in click Create and then click Done.

[Optional] To install a CA certificate on NetScaler Gateway You can use SSL to communicate between NetScaler Gateway, StoreFront, and XenApp/XenDesktop. To do so, install a CA certificate on the appliance.
This procedure is optional but I would highly recommend setting this part up to ensure all communication between your severs are encrypted.
In the NetScaler UI, on the Configuration tab, in the navigation pane, expand Traffic Management > SSL > Certificates and then click CA Certificates. Fill in the field as shown below and then press install.
(Remember you can download the CA certificate from the Microsoft Active Directory Certificate Services webpage – alternatively you can export it from your CA’s Certificate area using mmc)

Additional Changes – VPN Virtual Server/Gateway Settings/Storefront/Port Forwarding
Now your NetScaler has both the newly created Server Certificate and the CA, you are ready to bind/input your certificates in the other NetScaler settings. For instance your Virtual Servers will need the Server/CA certificates and so will your NetScaler Gateway Settings.
Virtual Server Settings:

Click Sever Certificate and then bind your created Server Certificate.
Then click Close and Do the same for your CA Certificate.

NetScaler Gateway Settings:

StoreFront:
On your Storefront server make sure to change your Stores Gateway appliance settings to match the Public IP URL of your NetScaler Gateway.

Router – Port Fowarding
Depending on your setup and what port your NetScaler virtual server is set to, make sure to setup port forwarding to ensure that external connections can reach your NetScaler server.
Client Computer Setup
Confirm that your CA Certificate is installed in the Trusted Root Certification Authorities in the Certificates container on the client computer.

[If you experience browser problems]
In Internet Explorer, turn off certificate revocation checking. This step is required because your private NetScaler server is unknown on the Internet.
On the Tools menu in Internet Explorer, click Internet Options > Advanced. Check that the publisher’s certificate revocation is set to Off. Check that the server certificate revocation is set to Off.
If you use a browser other than Internet Explorer (such as Firefox, or Safari) you might need to import the Trusted Root CA Certificate into the Certificate Manager, and turn off Online Certificate Status Protocol checking. This is off by default in Chrome.
Thats it! Now you have secure communication between your clients and your NetScaler.
**If you desire more security, check out my guide on how to setup Client Authentication, whereby the clients need a client certificate to be able to connect to the NetScaler.
Without Client Authentication, unwanted people can still gain access to your NetScaler login page and Storefront if they have stolen user credentials.
Thanks for reading – feel free to follow and stay updated 🙂 View sysadminguides’s profile on Facebook View GuidesSysadmin’s profile on Twitter View 115372466162675927272’s profile on Google+

Pingback: Setup Citrix NetScaler Client Authentication using a Windows CA | Windows SysAdmin Hub